Manual.ly Logo

Vitavia Freya Instrukcja-Obslugi

0,0 · 0 Oceny

Instrukcja PDF · 40 Strony

Polski

M: QW-35-FL
strona

/ 40

Loading...
b5e7c67602f6168892e69dfe410a71ca1e5d page 7
7
(4201) into the bolt channel in roof middle bars
(4256) (4.21).
Loosely connect the end horizontal bar (4275)
to roof glazing bars (4254 / 4256) and both
roof corner bars (4239 / 4240, 4245 / 4246)
(4.22).
Adjust the greenhouse until it is completely
square and tighten all bolts.
Please do not over tighten. (max. 3Nm)
5L and 5R. DOORS
Attention: Do not stand the assembled
doors on the door gliders (1014) to avoid
damaging them.
Push the door gliders (1014) onto both ends of
door bar (1360) (5.1).
Assemble the doors as shown in diagram 5.
Bolt door bar (1362) to upper bar (1359) (5.3)
and slide door seals (2021) into door bars
(2058) (5.5). Slide bolts (1500) into the bottom
of the bolt channel holding brush seals (2021)
and x it in place using nut (1515) (5.6). Cut
the door seals (2021) to length. Please ensure
that for the inside side bar the part (2098) is
used on the left in (5L) and (2099) on the right
in (5R).
Connect door rollers (1015) to the door bar
(1362) using bolt (1304), washer (1009) and
nut (1007) (5.4).
Connect door runner bar (1347) onto
horizontal bar (4234) (5.7). Connect spacers
(4208) (5.9L), (4209) (5.9R) and (4210) (5.8)
as shown.
Connect bolt (2001) at the join between both
(1347) as shown (5R).
Now slide the door rollers into the door runner
bar (1347) (5.10). Please ensure that the door
gliders are also running on the bottom track
(5.11). Once the doors are correctly in place,
connect nuts and bolts into the ends of both
door runner bars (1347), as door stoppers.
Adjust the doors so that they move freely.
6. VENTS
Note: Warm window seal (6034) to room
temperature! Press seal (6034) centrally onto
the top edge of glass pane (8) (6.1). Do not
stretch.
Make a cut into the seal at the corner (6.2) and
then press the seal onto the side and bottom
edges of pane (8), cutting to t around each
corner.
Fit vent bottom bar (6024) over the seal
(6.3) and then side bars (6020) and (6021).
Connect these at the corners using screws
(1008) (6.4).
Finish pressing the seal onto the top edge and
cut to length in the middle. Fit the top vent bar
(6025) and connect to side bars (6020) and
(6021) with screws (1008) (6.5).
Ensure that the vent is totally square before
tightening all screws.
Slide top vent bar (6025) into hinge bar (4247)
(6.6).
Loosely connect hinge bar (4247) between
glazing bars (4232) using bolts (2001) and
nuts (1002) (6.7) (6.8).
Loosely connect vent sill (6019) between
glazing bars (4232) using bolts (2001) and
nuts (1002) (6.9).
Lift vent sill bar (6019) and t it to the vent.
When correctly positioned tighten all bolts on
the inside.
Bolt the vent opener (1067) onto bar (6024)
using screws (6062). Connect both vent xers
(6056) onto sill bar (6019) using screws (6062)
(6.10) (6.11).
7. GLAZING – POLYCARBONATE / GLASS
Please note the already mentioned safety
precautions.
On the roof x the polycarbonate glazing
panes in place using the wind xing strips
(6614 / 6615) (7.2).
Note! The 6mm polycarbonate panes must be
assembled without using the glazing list (1020)
on the proles (7.1).
Important! The UV-resistant side is indicated
by the plastic lm and printing at the edge.
This side must face outside. Remove the lm.
Note! Completely remove the lm only after
the pane has been positioned in the
greenhouse. (The panes are cut marginally
shorter to allow for expansion in warm
conditions).
In order to give the Polycarbonate panes extra
stability connect them, in the middle of each
pane, to the eave prole with Z prole (1318)
(7.4) and at the ridge by pushing spacer
(2399) onto the ridge bars (4250) & (4275)
(7.3) (7.5).
Press the glazing seals (1020) onto the side
and door aluminium proles (7.6) and cut to
length.
On the side and doors x the glass panes in
place using the wind xing strips (6601 - 6608)
(7.7).
Note: Please follow the plan to cut the wind
xing strips to t the different positions (7.8).
If you’ve chosen polycarbonate sheets instead
of glass panes, please use the instruction
included in the box with the polycarbonate
sheets.
8. DOWN PIPES
Connect the down pipe parts on both sides of
the house as shown, (8.1) to (8.6). Ensure the
connection (1417) is included between (1408)
and (1402) (8.2).
9. LOUVRE (7600)
In the right eld above the door, connect
louvre sides (4203) and (4204) onto glazing
bars (4267) using bolts (2001) and nuts (1002)
(9.1) (9.3). Connect door strengthener (4206)
using spacer (4207) over louvre side (4203)
(9.1)(9.2).
Slide glass pane (13) into the ridge bar to sit
on louvre sides (4203) and (4204) (9.6) and x
in place using a cut length of the wind xing
strips (9.4) (9.5).
Open the louvre holders (9.6) and slide panes
(14) into the holders on both sides (9.7). Bend
the aluminium ends to x the panes in place
(9.8).
FINISHING
If desired, it is possible to seal the greenhouse
at the edges using neutral silicone. Silicone is
not in cluded.
Place the warning label inside the house.
A full range of accessories is available to help
you make the most of this product. Please
contact your local stockist for details.
SAFETY NOTICE
In the event of high winds, close all doors and
vents.
In the event of heavy snowfall, clear the roof of
the building or take suitable measures to
support the roof. Heat the building in winter.
COMMENTS
For the complete protection of your new
greenhouse, we advise you to include it in
your house insurance. Please take note of
possible building rules relating to the position-
ing of greenhouses.
Please stick the included greenhouse model
label onto the door bar (1362) after
successfully assembling this product. This
information is important in the event that
replacement parts are later required.
Please keep these Assembly Instructions in a
safe place, for future reference!
Our policy is one of continuous improvement
and we reserve the right to change the
specications without prior notice.
069.01.2007

Rozmawiaj z instrukcją obsługi Vitavia Freya dzięki AI

Otrzymuj natychmiastowe odpowiedzi AI z instrukcji obsługi Vitavia Freya

Zapytaj o Vitavia Freya. Odpowiedzi pochodzą z tej instrukcji, wraz ze stronami, na których są oparte.

Freya Harmonogram konserwacji

Okazjonalnie
Umyj szklarnię łagodnym detergentem

Okazjonalnie dokładnie umyj szklarnię, używając łagodnego detergentu, który nie reaguje agresywnie z aluminium lub klipsami mocującymi szkło.

Pokaż w instrukcji (strona 6)
Regularnie
Wyczyść górne i dolne prowadnice drzwi

Upewnij się, że górne i dolne prowadnice drzwi są regularnie czyszczone, aby uniknąć gromadzenia się brudu.

Pokaż w instrukcji (strona 6)
W razie potrzeby
Usuń śnieg z dachu przy intensywnych opadach

W przypadku intensywnych opadów śniegu usuń śnieg z dachu budynku lub podejmij odpowiednie działania w celu wsparcia konstrukcji dachu.

Pokaż w instrukcji (strona 7)
M: qwen/qwen3.8-flash

Zadaj Pytanie

0/1000

Czy polecasz Freya?

Tak Nie

Najczęściej zadawane pytania

A

Zawsze wybieraj słoneczne położenie osłonięte od wiatru tak bardzo jak to możliwe. Unikaj stawienia blisko wysokich budynków lub drzew gdzie turbulencja mogła by wystąpić podczas burz.

Czy ta odpowiedź była pomocna?

A

Będziesz potrzebował śrubokrętów, kluczy nasadowych, noża, pręta pomiarowego, poziomicy, piły i wkrętarki akumulatorowej z regulowanymi ustawieniami momentu obrotowego.

Czy ta odpowiedź była pomocna?

A

Strona odporna na UV wskazana jest przez plastikową folię i druk na krawędzi. Ta strona musi patrzeć na zewnątrz. Usuń folię tylko po ustawieniu płyty.

Czy ta odpowiedź była pomocna?

A

Tak, szklarnia musi zawsze być kotwiczona. Jeśli położona w wietrznych miejscach, wierte przez profil i stalową podstawę i połącz je nakrętkami i śrubami.

Czy ta odpowiedź była pomocna?

A

Upewnij się że górne i dolne tory drzwi są czyszczone regularnie aby uniknąć nagromadzenia resztek. To zapobiega blokowaniu i zużyciu poruszających części.

Czy ta odpowiedź była pomocna?

A

Nie, produkt jest przeznaczony wyłącznie do uprawy roślin. Przy używaniu do innych celów nie ponosimy odpowiedzialności za kwestie prawne.

Czy ta odpowiedź była pomocna?

A

Jeśli coś brakuje skontaktuj się ze swoim sprzedawcą natychmiast. Nie próbuj używać szklarni bez uzupełnienia pełnego zestawu.

Czy ta odpowiedź była pomocna?

M: QW-35-FL

Zalety i Wady

Zalety

  • Solidna aluminiowa rama opiera się rdzy i zapewnia stabilność strukturalną przez wiele lat
  • Elastyczne opcje oszkolenia pozwalają wybrać szkło lub płyty poliwęglanowe łatwo
  • Okna wentylacyjne grzbietowe zapewniają skuteczną cyrkulację powietrza aby zredukować przegrzanie w lecie
  • Drzwi przesuwne oszczędzają miejsce w porównaniu do tradycyjnych zawiasowych projektów na zewnątrz
  • Panele odporne na UV chronią rośliny przed surową szkodą słońca skutecznie
VS

Wady

  • Wymaga idealnie poziomego i prostokątnego fundametu podstawy dla poprawnego montażu
  • Dwie osoby są silnie rekomendowane do obsługi profili aluminiowych bezpiecznie
  • Rynny i rury spustowe muszą być instalowane oddzielnie aby zarządzać odpływem wody deszczowej
  • Maksymalny moment dokręcania musi być szanowany aby uniknąć uszkodzenia gwintów
  • Kotwienie podstawy jest obowiązkowe dla bezpieczeństwa w lokalizacjach narażonych na silne wiatry
M: QW-35-FL

Produkt Specyfikacja

Rama

Aluminium

Drzwi

Podwójne drzwi przesuwne

M: QW-35-FL

Opis Produktu

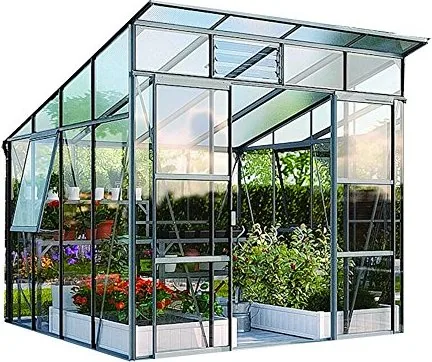
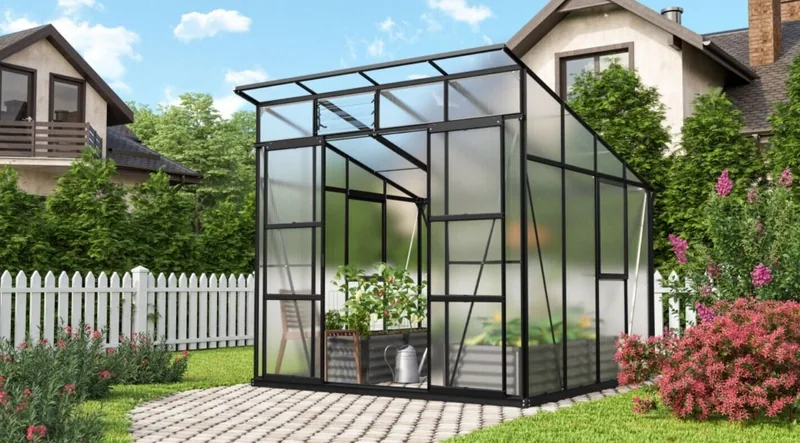
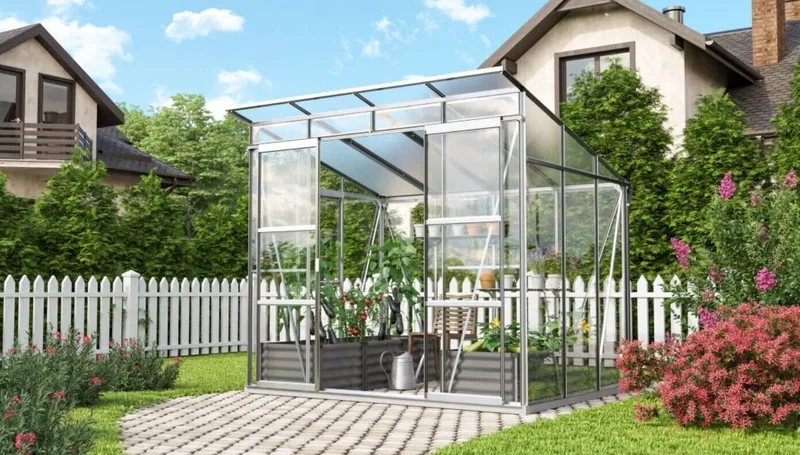
Odkryj Ogrodniczą Doskonałość z Instrukcją Szklarni Vitavia Freya

Tworzenie kwitnącej ogrodowej oazy zaczyna się od odpowiedniego sprzętu. Ta solidna szklarnia oferuje idealne środowisko do uprawy roślin przez cały rok. Zaprojektowana zarówno dla amatorów jak i doświadczonych hodowców, zapewnia obfitą przestrzeń i kontrolę światła niezbędną do sukcesu. Aluminiowa rama zapewnia stabilność pozwalając jednocześnie na elastyczność wobec różnych warunków terenu. Wielu użytkowników docenia smukły design, który pięknie dopełnia przestrzeń zewnętrzną.

Przegląd Montażu

Właściwe ustawienie jest kluczowe dla długoterminowej wydajności. Wybierz słoneczne miejsce chronione przed silnymi wiatrami, aby chronić delikatne liście. Wymagana jest solidna podstawa, która musi być wy równym poziomem i prostopadle przed przystąpieniem do prac. Podczas składania oddzielnych elementów pomaga mieć dwie osoby trzymające profile aluminiowe bezpiecznie. Przed otwarciem paczek sprawdź wszystkie części względem listy inwentaryzacyjnej. Niewielkie luzy w połączeniach są normalne na początku dopóki nie nastąpi końcowe dopasowanie. Dokręć śruby ostrożnie bez stosowania nadmiernej siły przekraczającej określone limity.

Jakość Materiału i Opcje

Wybierz między panelami poliwęglanowymi a szkłem zgodnie ze swoimi preferencjami. Poliwęglan oferuje mniejszą wagę i lepsze właściwości izolacyjne w zimniejszych klimatach. Szkło zapewnia przejrzystość i klasyczny estetyzm dla tradycyjnych zagospodarowań ogrodowych. Bez względu na wybór upewnij się, że strona odporna na UV skierowana jest na zewnątrz podczas montażu. Zdjęj folie ochronne dopiero po prawidłowym ustawieniu każdej szyby. Belki oszklenia zabezpieczają płyty stanowczo przed obciążeniami wiatrowymi. Okna wentylacyjne na grzbiecie pozwalają gorącemu powietrzu uciekać wydajnie podczas letnich fal upałów.

Dbanie i Konserwacja

Regularna opieka utrzymuje Twoją strukturę funkcjonującą optymalnie przez lata. Myj ramę okazjonalnie używając łagodnych roztworów detergentów do usunięcia zabrudzeń. Czyść tory drzwi często aby zapobiec nagromadzeniu śmieci które utrudniają ruch. Sprawdzaj uszczelki regularnie aby utrzymać wodoodporne bezpieczeństwo wewnątrz obudowy. Usuń śnieg z dachu pilnie w miesiącach zimowych aby uniknąć ryzyk awarii. Grzanie może być konieczne gdy temperatury spadają znacznie poniżej poziomu zamarzania.

Dodatkowe Rozważania

Opcje akcesoriów znacząco wzmacniają funkcjonalność. Regały i systemy nawadniania mogą być dodane później lokalnie. Polisy ubezpieczeniowe pokrywające struktury ogrodowe to mądre inwestycje. Utrzymuj etykiety modelu przytwierdzone do drzwi dla potrzeb identyfikacyjnych. Ciągłe ulepszenia oznaczają nowsze wersje mogą pojawić się wkrótce.

M: QW-35-FL

© Copyright 2026 Manual.ly
